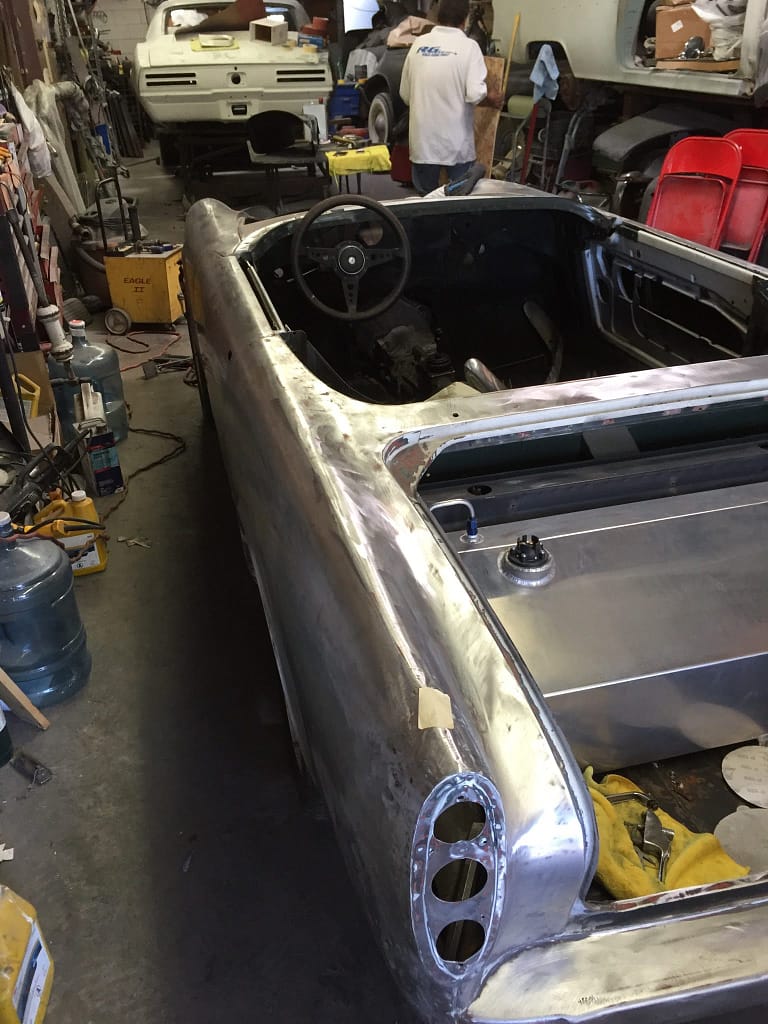
Since the successful install of the motor and transmission, we started pushing on getting the project in full gear. The main things we wanted to get done were the exhaust and bodywork. However, my dad kind of went off the rails and decided to install a new gas tank without even talking about it. My dad took the car to a Hot Rod shop and had a custom gas tank fabricated and installed. I was pretty surprised when I showed up one day with the trunk half-filled with aluminum, but I decided not to fight that battle at the moment. I shrugged it off knowing full well the new gas tank’s days were numbered.
At the same shop where the gas tank was fabricated, my dad had a transmission tunnel built. The tunnel was a step in the right direction but in hindsight, it was premature. A lot of the components weren’t in the car yet, and the fitment wasn’t ideal but it was a good first concept.


My dad also took the car to a local exhaust shop, ARCE Muffler. We had a 2″ exhaust put on the car with an H-pipe installed at the transmission. The shop took extra care to make sure the exhaust was fully removable with V-band clamps. We also had Sunbeam Tiger exhaust cutouts welded into the X-chassis to allow for the dual exhaust since the original Sunbeam Alpine exhaust had only one pipe. To my surprise, the Tiger exhaust cutouts were readily available on eBay. The exhaust was also run above the rear end to avoid any exhaust scraping. We chose mild-sounding mufflers since we didn’t want to go deaf driving in a convertible. ARCE Muffler did an amazing job with the install and we couldn’t be happier with the exhaust. Sounds great too, but that’s for later.


We then decided to get the body looked after. The car was originally green and had been repainted white at some point in its lift. The car on the outside appeared to be straight and relatively undamaged. We decided the only way to really know was to take the car down to bare metal.
My dad found a recommended body shop that specialized in classic cars. We dropped the car off and the shop got to work. After the car paint was completely removed, we discovered the front headlights might have been impacted at some point. There were also signs of a dent above the right rear passenger tire. All of the repairs were relatively minor and were addressed.
Throughout this who trip to the body shop, we knew this was not the final body restoration since we were missing a few things. The engine was still in the car so the engine bay and firewall wasn’t given the care and attention it needed. The final fitment of the valence needed to be completed as well since we hadn’t quite settled on wheels and tires. Most times the valence needs to be trimmed to allow for modern wheels and tires. There was also damage to the front radiator sheet metal from the jack incident that needed to be fixed. Lastly, the headlights weren’t quite fitted and the body shop had to guess the location of the headlights.


The car was far from perfect, but the car body looked lightyears better from where it was. The panels and doors looked straight as an arrow. We now had a great template to get the car running and mechanically sound. It was always the plan to get the car in running condition and slowly work out the gremlins. We still had to get the car running. Not a bad start 2-1/2 years into the project. We had a cleaned-up body, installed the motor and transmission. Pretty good progress considering I had a full-time job and was working in Canada for most of the project thus far.

Next up for the project, the fiddly bits. Everything from the cooling hoses, carburetors, distributor, throttle linkages all had to be addressed. This was the most detailed and winding part of the project began. I had to spend countless hours researching and talking to people who have done this before just to figure out how this puzzle went together. Stay tuned. Motor on.

