E30 Project: Manual Swap Part 3 “Transmission and Clutch Install”
After many months of researching and purchasing new parts, it was finally time to install the new transmission. I had all of the parts and pieces ready, now it was time to install the 5-speed Getrag 260. If you haven’t done a transmission install before, it’s a pretty simple process, if everything goes according to plan, which it always does of course. The hardest part is aligning the input shaft properly to allow the transmission to slide into the clutch disk and pilot bearing. A jack and a mate are recommended to help with this installation. I jacked up the car and put it on jack stands. I decided to make the call to install the transmission with the shift linkage installed due to limited access on the top of the transmission when everything is buttoned up. There is a clip that secures the top shit arm to the transmission and it is often referred to as the “bitch clip” and I wanted to avoid any drama. This however would make things slightly more difficult but really the only thing I had to contend with during the transmission install, was elevating the linkage with the transmission.
Back of the engine with the pilot bearing installed
Clutch installed and ready for the transmission
Before I installed the transmission, I had to get the lightened single mass flywheel and clutch installed. In a previous post, I went into the details of what clutch and flywheel I chose. The installation of both is fairly straightforward. Careful attention must be paid to the orientation of the clutch disk. There is typically a mark or lettering showing which side has the correct orientation of the clutch disk. I also installed a new pilot bearing, since there wasn’t one for the automatic transmission which I found odd. There is a lip that prevents the bearing from going in too far. Another thing to make sure to do when installing the clutch is to use the plastic alignment tool to install the clutch disk. This tool sits in the pilot bearing and grooves of the clutch disk. This tool holds and aligns the clutch disk when installing the clutch spring. If the tool is not used and the clutch disk is not aligned, the transmission will not slide into place. I made extra sure this was done right and everything was aligned correctly.
Schematic from ReaOEM showing required hydraulic parts
Part Numbers for Hydraulic Parts
Installing the transmission is only half the battle when taking on a manual swap. There is a non-existent hydraulic system that needs to be installed. The schematic from RealOEM helped me understand how the system worked in the car and what parts to buy. I can’t say enough about RealOEM in helping with these types of projects. Although the website is riddled with ads, this free service is a lifesaver. I also find it funny when I go into a BMW dealership and ask for a part, they use the same website. Who operates the website is still a bit of a mystery but I hope RealOEM stays alive for as long as humanly possible.
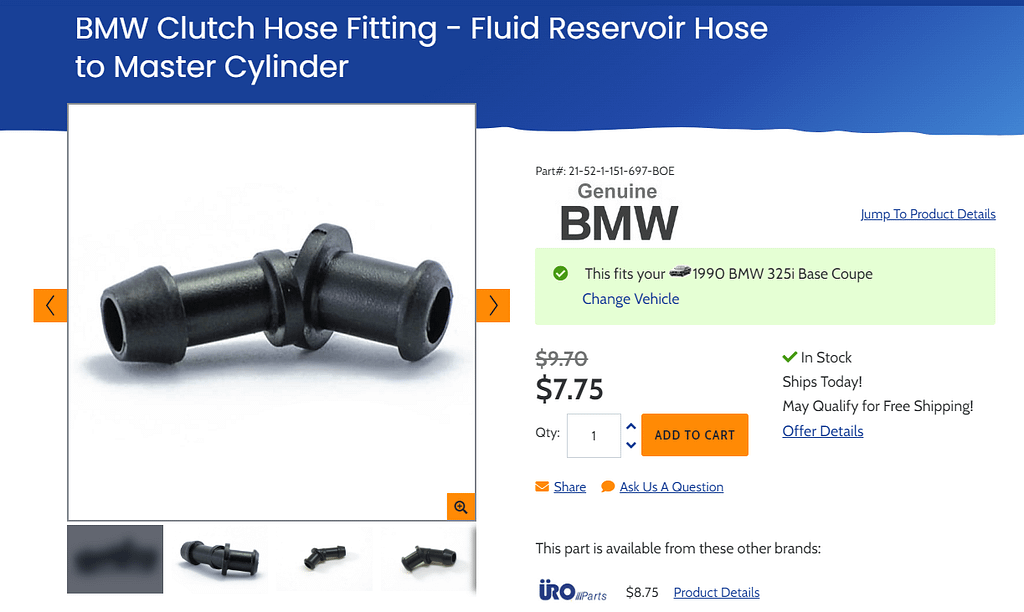
Hose Fitting for Master Cylinder
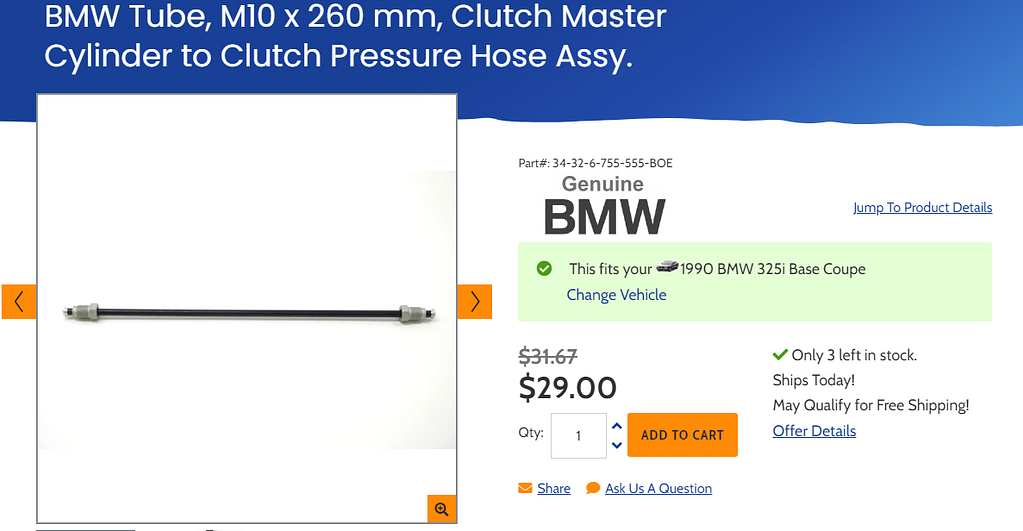
Fluid Hose from Reservoir to the Master Cylinder
Clutch Master Cylinder
I purchased most of the clutch parts from Pelican Parts. It’s amazing they have most of these parts in stock. They even have a lot of the bolts and nuts shown on RealOEM. Pelican Parts is another godsend and not to mention it being close to my house with quick and cheaper shipping is always a plus. I always try to use Genuine BMW parts but sometimes the cost does hurt the pocketbook. I typically use an expensive Genuine BMW part when it absolutely cannot fail.
Four bolts hold on the manual pedal assembly
Installed Clutch Master Cylinder
Clutch Pedal Install Complete
Before I could install the hydraulic line for the clutch, I had to swap out the pedal box from an automatic to a manual. This is a simple operation. The pedal box is only held on with six bolts, four of which are on the firewall which connects the brake booster. Two more bolts connect to the dash. The swap requires being under the dash and if you are tall like me, make sure you stretch first. I prepped the pedal box before the installation so I wasn’t trying to install the pedals while under the dash. I also added the clutch master to the pedal box which is held on with two bolts that screw into the pedal box. Once the whole assembly was prepped, I removed the old pedal box and installed the new one. After installation of the pedal box, I simply hooked up the new springs and the pedal swap was complete. The only casualty was a stiff neck. Now I was ready to install the hydraulic lines for the clutch.
Brake Line Forming Pliers
Brake Line Bender
Hydraulic Hard Line from Clutch Master Cylinder to the Clutch Slave
When doing a manual conversion, the hydraulic lines that operate the clutch slave cylinder are missing. However, BMW was quite clever in its manufacturing. The manual clutch hardline brackets that secure the line are installed in both manual and automatic E30 cars. The only thing you need to do is bend a hardline from the clutch master to a braided stainless steel line which runs to the clutch slave located on the transmission. The hardline comes straight and must be bent by hand. I purchased a few brake line bending tools in order to get this completed. I purchased two hand tools and found the plier-type tool the most useful during this installation. See the two photos above for reference. Both can be found on Amazon or online for cheap or you can go to Eastwood and buy a quality one.
Installed Hardline from the Master Clutch Cylinder
Stainless Braided line hooked up to the hardline
Both did the job perfectly. I was pretty satisfied with the installation and it fit perfectly in the BMW hardline bracket locations. I then hooked up the braided line and slave cylinder. The above photos show my handiwork and I am proud enough of it to show it on the internet. I had never done break lines and am by no means an expert but the whole experience was fairly simple. Not sure I would bend an entire car’s worth of brake lines but a new skill unlocked.
Clutch Nipple at Brake Fluid Reservoir
Clutch Hydraulic Line being run to the Clutch Master
The brake and clutch hydraulic systems share the same reservoir making the conversion from automatic to manual transmission simple. The only thing you need to do to utilize the reservoir is cut off a plastic nipple on the side of the reservoir and install a flexible line from the reservoir to the clutch master cylinder which is installed at the pedal assembly. I cut the nipple and installed the line with no drama. The photos show how the line is cut and the final installation of the cut nipple. I’m a sucker for a clean install and BMW should be commended for making all this swap as easily as possible.
Transmission read y to install
Installed Getrag 260 Transmission
With all of the clutch lines run and the pedals installed it was now time to lift the transmission into place and bolt it in. As mentioned, I wanted to install the transmission with the shifter linkage in place just to avoid an unnecessary installation after the transmission was installed. I grabbed my buddies to help with the installation, and after a small struggle, the transmission was in. Without removing the intake manifold, the installation of the starter motor is by far the hardest part. BMW decided the starter bolts needed to be secured with nuts rather than just a bolt. The starter install was the hardest part of the whole install. With the transmission in, All that was left was to install the clutch slave to the transmission and finalize the shifter linkage.
Fully installed shifting linkage
Installed linkage in the interior
The shifter linkage wasn’t too difficult to install with the transmission. The shifter arm bushing could be pushed forward on the shifter arm, which allows you to install the bushing in place. The rubber seal which prevents water from going into the cabin wasn’t a huge fight just fiddly. Be sure to install the shifter in the correct orientation. One can make the mistake of installing the shifter backward and then the shifter will be too far forward. Ask me how I know. The last thing is to install the reverse wiring harness into the harness and the transmission install is complete. Up to this point, the whole process of doing the manual swap took a couple of months. Understanding the entire project was broken up into many phases and required a good amount of research before I moved on. I think this is a must in the E30 community now because all that is left are automatic cars. Finding a good E30 manual car is almost impossible but there are plenty of automatic cars. Next up is finishing the drivetrain and getting some miles on the car and ironing out any issues with the car. Motor on.